Start with an exposed account, device, or dataset in your environment. Each action below includes a pilot, a console example, and evidence you can use to decide whether to expand the change.
lock802 selected these priorities for Microsoft environments and mapped them to outcomes in the NIST Cybersecurity Framework 2.0. The mappings describe how each action contributes to an outcome. Microsoft’s linked guidance covers product-specific details.
Passkeys resist credential phishing. Start with administrators because a compromised privileged identity can affect the entire tenant.
Access needed. Entra authentication methods administrator for setup. Enforcing an authentication strength through Conditional Access requires Entra ID P1 or higher for covered users.
In Entra ID, open Authentication methods → Policies → Passkey (FIDO2). Enable the method for a pilot security group.
Have a pilot administrator register a supported passkey through Security info and test it in a fresh browser session. Keep a tested emergency access path before requiring the new method.
Verify the result. Inspect the sign-in’s authentication details. Confirm the pilot used the passkey. Registration alone does not require it on future sign-ins.
Registered security key details, including the authenticator model identifier. Full-size screenshot
Long-lived administrator assignments increase the impact of a compromised account.
Access needed. Directory read access to review assignments. Privileged Role Administrator to change them. Optional just-in-time activation through PIM requires an eligible Entra ID P2 or Governance entitlement.
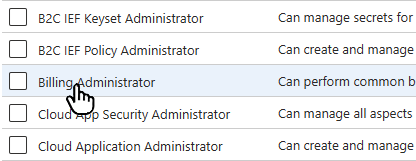
Open Entra ID → Roles and administrators → Global Administrator → Assignments. Record each assignment, its owner, and the task that requires it. Check group-based access as well.
Select one routine task and assign the narrowest role that supports it. Test with the owner before removing the broad role. Preserve emergency access accounts.
Verify the result. Export or record the revised assignment list. Confirm the owner can complete the intended task and no longer holds the broader role through another assignment.
Roles and administrators, where you open a role to inspect its assignments. Full-size screenshot
Older clients can use authentication flows that cannot satisfy MFA. Identify active dependencies before enforcing a block.
Access needed. Entra ID P1 or higher for covered users and a Conditional Access Administrator.
In Entra sign-in logs, filter Client app for legacy authentication clients. Review interactive and non-interactive sign-ins. Identify owners of devices and jobs still using these clients.
Create a pilot Conditional Access block policy for legacy client apps. Exclude emergency access accounts, evaluate in Report-only, and migrate dependencies before enabling the block.
Verify the result. After enforcement, confirm a controlled legacy attempt is blocked by the intended policy and the replacement modern client still works.
Client app filters used to distinguish legacy and modern authentication. Full-size screenshot
A valid password or session does not establish that a device meets your organization’s requirements.
Access needed. Entra ID P1 or higher, an Intune compliance policy for the pilot devices, and a Conditional Access Administrator.
Choose one application, pilot users, and a supported device platform. Create a Conditional Access policy granting access only on a device marked compliant. Exclude emergency access accounts.
Start in Report-only. Compare sign-ins from a compliant pilot device and a noncompliant test device. Check exclusions and device identity before enabling for the pilot.
Verify the result. Open each sign-in’s Conditional Access details. After pilot enforcement, verify the compliant device succeeds and the noncompliant device is denied by this policy.
A device can be enrolled while still missing encryption or running an unsupported OS.
Access needed. Intune Plan 1 or equivalent for the managed users or devices. An Intune role with compliance policy permissions.
For a pilot Windows group, create a compliance policy with an approved minimum OS version and a BitLocker requirement. Use your supported build baseline and an appropriate grace period.
Assign it and sync a test device. Open Devices → Compliance, select the policy, then View report. Inspect devices with errors, pending results, or no policy assignment.
Verify the result. Inspect per-setting status on a test device before and after remediation. A compliance policy measures the setting; configure encryption separately if it is missing.
A discovered device can appear in inventory before it is onboarded. An inventory count alone can hide gaps in monitoring.
Access needed. Defender for Endpoint entitlement for the devices. Plan 2 provides the full inventory and investigation experience described here. Servers require appropriate coverage.
In the Defender portal, open Assets → Devices. Compare onboarding status and sensor health against your managed-device inventory. Separate retired devices from active gaps.
Onboard one missing, supported endpoint using your approved deployment method, or repair its sensor. Record an owner for each remaining active gap.
Verify the result. Confirm the device reports as onboarded with a healthy sensor. Open its Timeline and check for recent activity after the device checks in.
A device timeline used to verify that endpoint activity is reaching Defender. Full-size screenshot
A long CVE list is easier to act on when you know which vulnerable devices are business-critical or exposed.
Access needed. Defender for Endpoint Plan 2 or eligible Defender Vulnerability Management licensing. Use a patch deployment tool and an approved maintenance window.
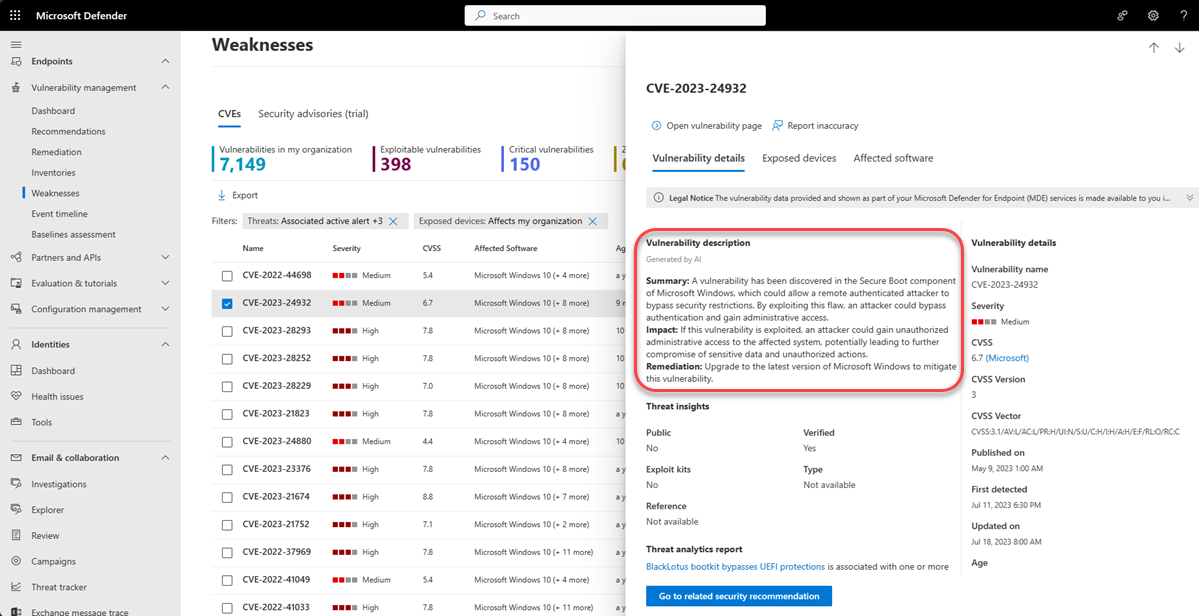
In the Defender portal, open Exposure management → Vulnerability management. Select a vulnerability with affected devices. Check exploit information, software versions, and asset importance.
Choose one supported update, assign an owner, and deploy to a test ring. Check application health before extending deployment.
Verify the result. After inventory refreshes, confirm the fixed device drops from the affected list. Record any remaining exception, accountable owner, and review date.
Vulnerability detail pane used to inspect a CVE before selecting remediation. Full-size screenshot
An anonymous sharing link can travel beyond its intended recipient.
Access needed. SharePoint Online and a SharePoint Administrator. Site settings are bounded by the organization-wide sharing limit.
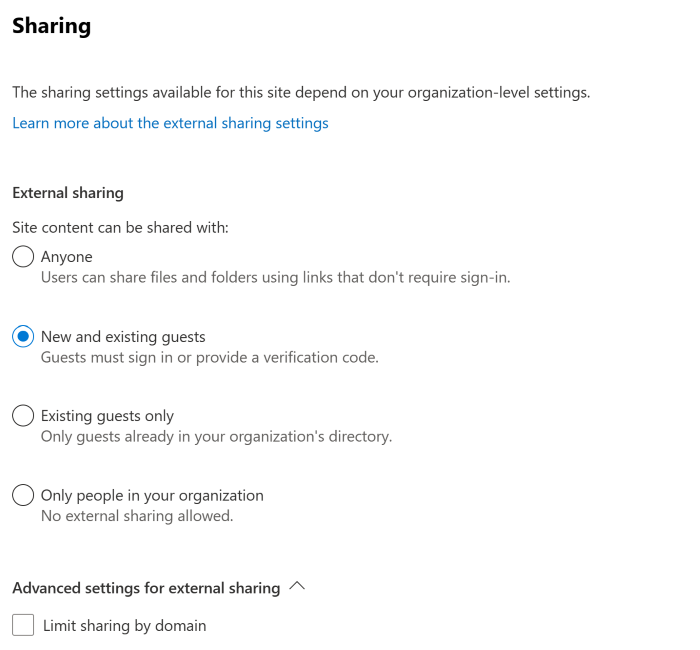
In SharePoint admin center → Active sites, select a sensitive pilot site and open its sharing settings. Review whether guests are needed and whether Anyone links are allowed.
Choose an authenticated guest option where external collaboration is needed, or restrict the site to your organization. Review existing grants and links with the site owner.
Verify the result. Try sharing a test file. Check that an Anyone link cannot be created, test an existing anonymous link in a signed-out browser, and confirm intended guests retain approved access.
Site-level external sharing settings in the SharePoint admin center. Full-size screenshot
Seeing an alert is only the first step. Analysts need enough evidence to connect a user, a device, and a sequence of events.
Access needed. Relevant Defender workloads and incident read access. For Sentinel evidence, use a connected Microsoft Sentinel workspace with the necessary data connectors and permissions. Ingestion charges can apply.
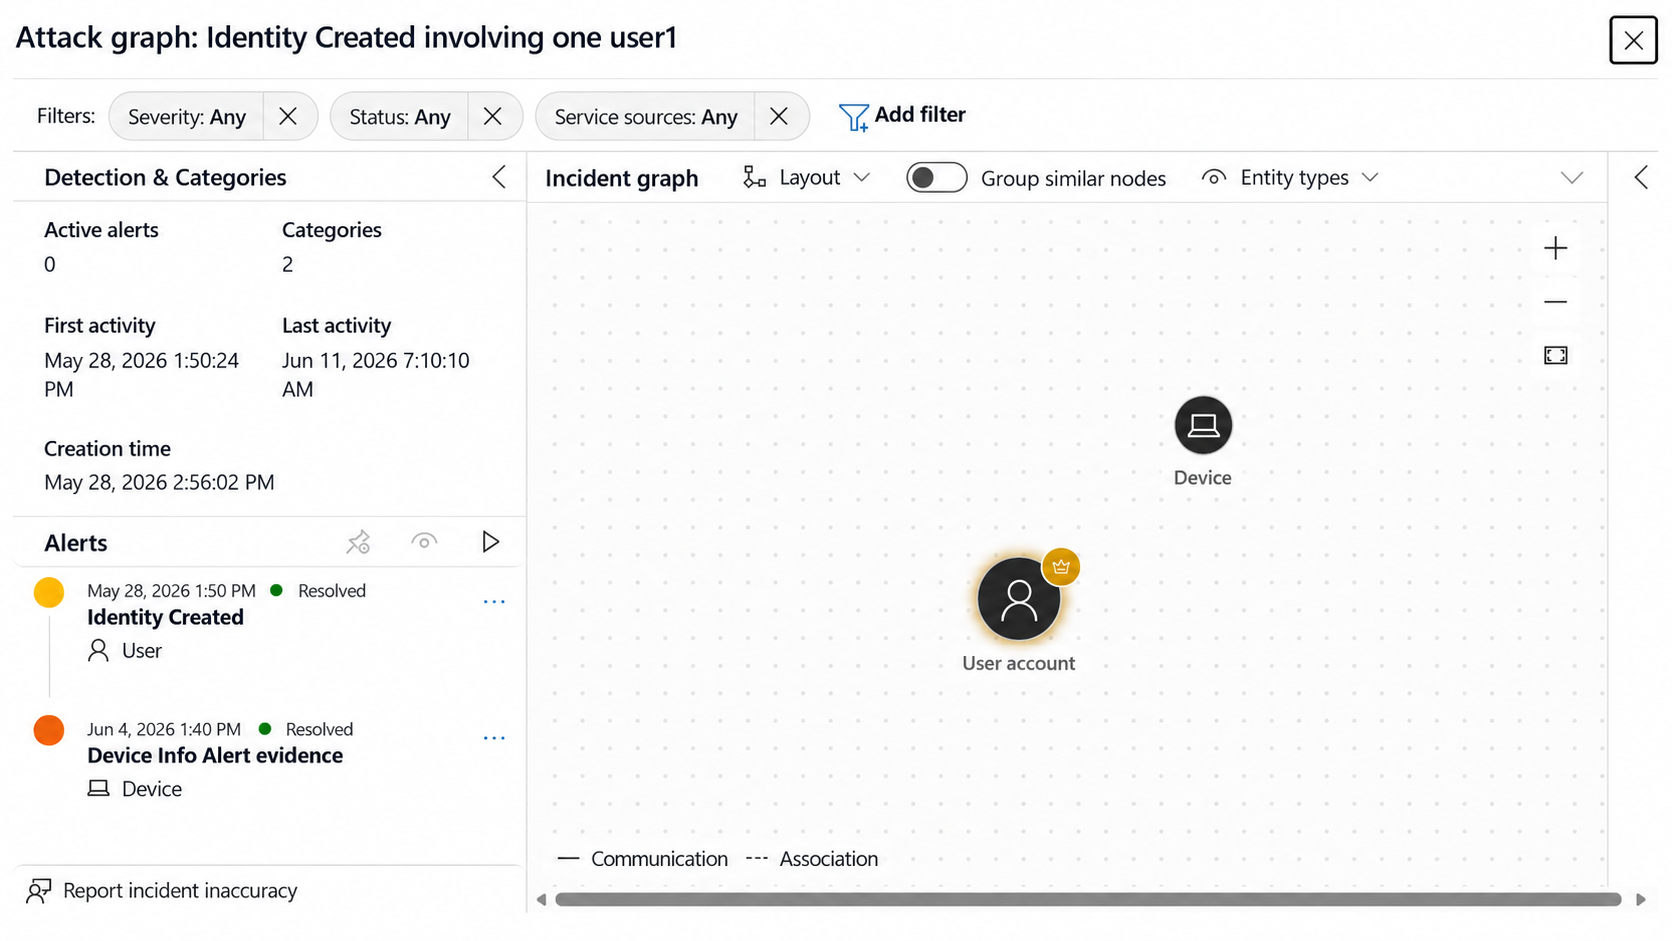
Select a known test incident or previously reviewed case. In the Defender portal, open its attack graph and inspect the affected entities, alert sources, and event times.
Ask an analyst to reconstruct the sequence using two available sources. If an expected source is absent, check its connector, time range, and entity mapping before changing the detection rule.
Verify the result. Save the incident reference and a short timeline naming the evidence from each source. Assign an owner to any missing evidence and repeat after remediation.
A restore exercise shows whether a team can recover usable content and explain which changes a rollback will undo.
Access needed. SharePoint in Microsoft 365, a modern test library with versioning, and a site administrator. Use a dedicated test library for this exercise.
Create two harmless test files and record their contents. Modify one and delete the other. Record when each action occurred.
Open Settings → Restore this library. Select the point just before the test changes and inspect the activity list. Restore only the dedicated test library; the operation rolls back subsequent library activity.
Verify the result. Open the restored files, compare their contents with the originals, and test access with an intended user. Record elapsed recovery time. Assess separate backup needs against your required retention window.
The restore activity chart and slider used to choose a recovery point. Full-size screenshot
 lock802